Finishing a cake with cream is not only a matter of aesthetics, but also functionality. A properly prepared mixture acts as a protective layer and creates a smooth background for further decoration. Cake frosting should be stable, flexible, and easy to apply—only then will it allow for precise surface alignment and give the whole cake an elegant look.
However, not every mixture will work in this role. The best cake frosting should be resistant to temperature changes. It must be easy to spread, not form lumps or air bubbles, and at the same time allow for precise modeling and coloring. In the following article, we advise how to plaster a cake, present proven recipes, and share practical tips that will help you achieve a result worthy of a master confectioner's workshop.
Table of contents:
2. Buttercream frosting for cake – recipe
3. Types of buttercream frostings for cakes
3.1. Buttercream on Italian meringue
3.2. Buttercream on Swiss meringue
3.4. Buttercream made with condensed milk
4. How to add variety to buttercream frosting for a cake?
5. Mascarpone cake frosting – recipe
6. How to frost a cake step by step?
7. The most common mistakes when frosting a cake
8. Cake frosting – frequently asked questions (FAQ)
8.1. What is the difference between frosting and filling cream?
8.2. Can cake frosting be colored?
8.3. Why does my frosting have holes and not look smooth?
8.4. How thick should the frosting layer be?
8.5. Which cream should you choose in summer?
8.6. Is every cake suitable for frosting?
8.7. How to whiten cake frosting?
8.8. How many layers of frosting should be applied?
8.9. What to do when frosting curdles?
8.10. How to make black frosting for a cake?
8.11. How to remove air bubbles from cake frosting?
8.12. How to store cake frosting?
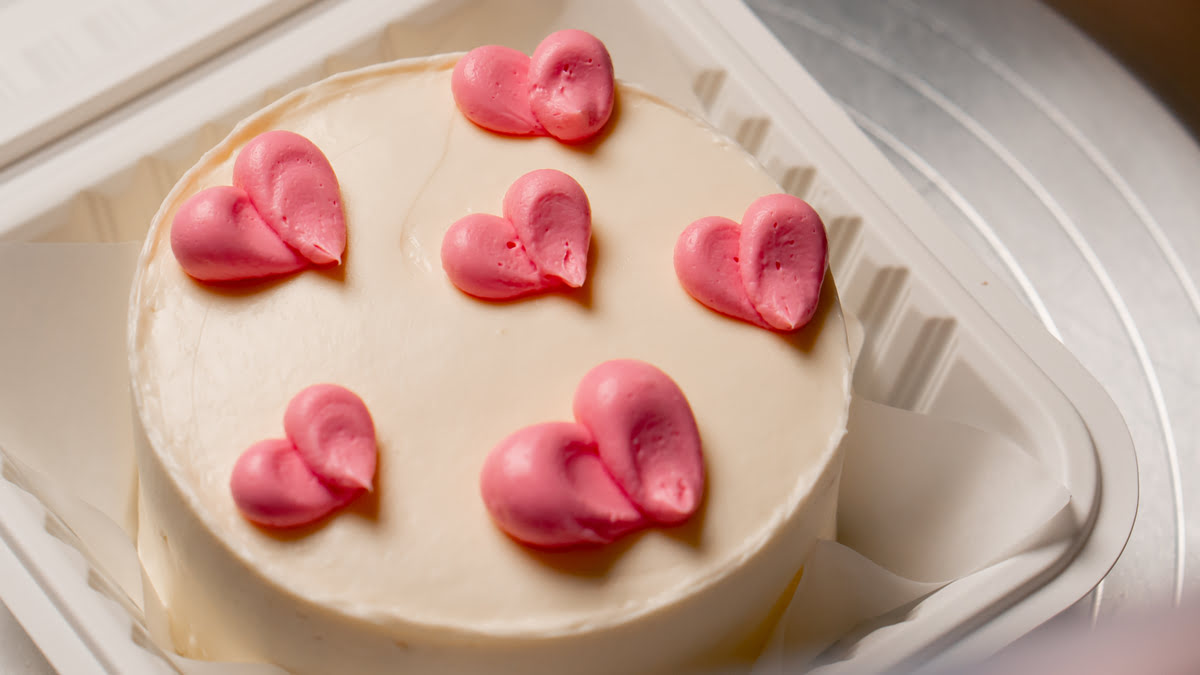
Cake frosting
Cake frosting is nothing more than a layer of cream, filling, or ganache that is applied to the outer parts of the cake—both the top and sides. Its purpose is to smooth the surface, even out the edges, and prepare a solid base for decorations. It is thanks to this that the cake looks elegant and professional—without unevenness, air bubbles, or layers of cake showing through.
Plastering a cake requires not only a good recipe, but also precision and the right tools. The following will be useful in this process:
- pastry spatula,
- rotating cake stand,
- angle scraper for smoothing edges,
- pastry bag for spreading cream.
A properly chosen frosting mass should be pliable, easy to apply, and hold its shape well—only then is it possible to obtain a uniform, smooth coating. Regardless of whether you are preparing a simple homemade bake or an impressive cake for a special occasion, a properly applied frosting elevates the entire dessert and gives it a distinctive visual character.
Buttercream frosting for cake – recipe
If you are looking for a stable and versatile mixture that works well as cake frosting, classic buttercream is an excellent choice. It is a reliable base for fondant icing or impressive decorations made with a pastry bag. Buttercream frosting for cakes is suitable for finishing the top and sides, as well as for layering the cake. Its structure allows for precise surface alignment and preservation of decorative shapes.
Ingredients:
- 200 g soft butter (min. 82% fat)
- 170 g powdered sugar (sifted)
- 1–2 tablespoons of milk (optional)
Tip: All ingredients should be at room temperature—this is the key to achieving the perfect consistency.
How to prepare buttercream frosting for a cake?
Step 1:
Place the softened butter in a bowl. It must not be too hard—only then will it whip well and create a uniform, fluffy base.
Step 2:
Beat the butter with a mixer on high speed for about 5–8 minutes. It should turn almost white and become light and creamy.
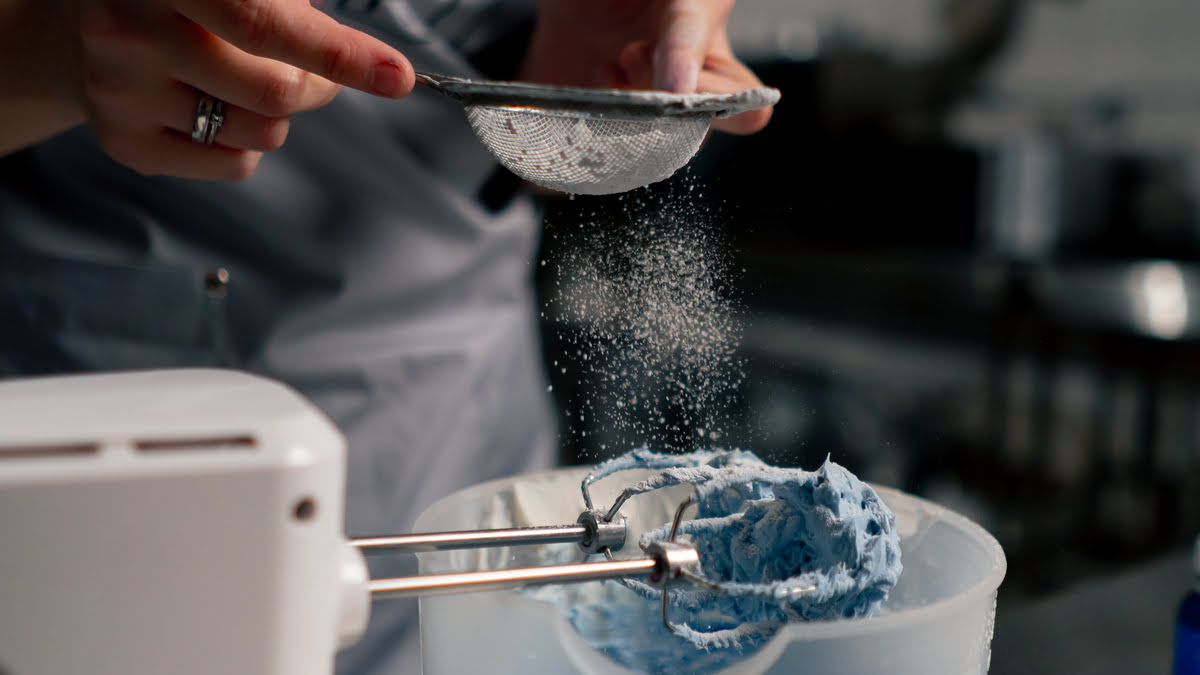
Step 3:
Add the powdered sugar in batches, mixing continuously. The process of creaming with sugar should take 2–3 minutes—until the ingredients are completely combined.
Step 4:
Finally, you can add a little milk—adjust the amount depending on what you plan to use the mixture for. If you plan to decorate the cake with cream, just a little will suffice to maintain its stiffness. If you want to use the cream to layer the cake, you can add a little more to achieve a more velvety consistency.
This simple cake frosting is perfect for home and professional baking. It is easy to color, tolerates transport well, and does not change its structure even at higher ambient temperatures. So if you are wondering what to cover your cake with and you care about durability and an elegant finish, buttercream is the perfect choice.
Types of buttercream frostings for cakes
Choosing the right base for frosting a cake is extremely important for the visual effect and durability of the baked goods. Although all butter-based cake frostings have the same foundation—high-quality creamy butter—different preparation methods give the mixture different flavors, textures, and degrees of stability. Below are the most popular types of buttercream, which work well both as a cake topping and filling.
Buttercream on Italian meringue
This variant is considered one of the most elegant and sophisticated. It is made by slowly pouring hot sugar syrup into beaten egg whites—this way, the whites are pasteurized, which improves the cream's durability. Finally, butter is added, creating an exceptionally stable yet light mixture—ideal for frosting cakes and creating decorations with distinct shapes.
Buttercream on Swiss meringue
In terms of structure, it resembles Italian cream, but the preparation process differs in the way the proteins are heat-treated. Here, the sugar and proteins are heated together in a water bath until dissolved, and then whipped until a shiny meringue is obtained. When combined with butter, the result is a velvety cream with a delicate flavor that is perfect as a white cake frosting—especially when you want an elegant, clean finish.
American buttercream
This is the easiest and quickest way to prepare a simple frosting for a cake. Just combine soft butter with powdered sugar, and optionally add milk and vanilla extract. Despite its simplicity, this cream is extremely effective—it holds its shape well, is easy to color, and is suitable for both cake decoration and creating sharp edges. Its disadvantage may be the slightly more noticeable taste of butter.
Buttercream made with condensed milk
This is an interesting alternative for those looking for a quick solution with an exceptionally smooth texture. It is made by combining butter and sweetened condensed milk in a 1:1 ratio. This cream is distinguished by its white color and high susceptibility to coloring, making it a great option for those creating plastered cakes in pastel or intense colors. Although less resistant to high temperatures than meringue variants, it still does a good job of finishing a cake.
How to add variety to buttercream frosting for a cake?
Although the classic version of buttercream frosting for cakes has many fans, there is nothing to stop you from giving it an individual character. Carefully selected additives can completely change the taste and aroma of the mixture, enhancing the aesthetic and taste qualities of the baked goods. This will give even a simple cake frosting a unique touch that will delight your guests.
It is worth adding ingredients to the basic butter cream that will introduce new flavors and an interesting texture. The following work very well:
- melted chocolate (white, milk, or dark),
- fruit puree (e.g., raspberry, strawberry, mango),
- lemon or orange curd,
- ground nuts—hazelnuts, walnuts, or almonds,
- jams and preserves with an intense flavor,
- espresso or instant coffee,
- liqueur, brandy, or whiskey—in small amounts for the “adult” version.
If you want a more subtle effect, you can also use pudding as an addition. Classic vanilla custard is not the only option—chocolate, caramel, or cream versions work just as well. They will make the cake frosting more velvety and light, while enriching it with a delicate flavor.
Mascarpone cake frosting – recipe
If you want a cream that is light, stable, and pleasant to the taste, mascarpone cake frosting is the perfect choice. This type of filling is ideal for both layering and finishing your cake. The combination of mascarpone and heavy cream gives it a velvety texture that is easy to spread and smooth, creating a uniform surface.
Ingredients:
- 500 ml heavy cream 30% or 36% (chilled)
- 250 g mascarpone cheese (straight from the refrigerator)
- 3 tablespoons powdered sugar (sifted)
How to prepare the frosting for a mascarpone cake?
Step 1:
Start with well-chilled cream—it should be fresh and taken directly from the refrigerator. Place it in a dry bowl together with sifted powdered sugar and mix on high speed for about 3–4 minutes, until the mixture begins to thicken. Make sure that the bowl and mixer attachments are clean and dry—even a small amount of moisture can make it difficult to whip the cream.
Step 2:
When you notice that the cream is beginning to form and become stiff, add the mascarpone. Mix briefly, just until you obtain a uniform, compact consistency.
Step 3:
The finished cream should be smooth and stable. It is perfect as a cake frosting, especially if you want a natural flavor and a snow-white finish. It can also be used to decorate cupcakes, muffins, and other desserts.
Frosting for mascarpone cake – additional tips
- Be careful not to mix for too long—the cream may curdle.
- On warm days, it is worth considering adding edible gelatin or cream stabilizer to increase the shelf life of the mixture.
- A cake covered with this cream should be stored in a cool place, and the cream itself should be kept in the refrigerator for up to 3 days.
- Before applying, make sure that the sponge cake or other cake has cooled completely—only then will the cake frosting retain the right texture.
How to frost a cake step by step?
An impressive plastered cake begins long before the cream is applied—the key lies in the proper preparation of each element. From choosing the sponge cake to precisely smoothing the final layer, each stage affects the final appearance and stability of the dessert. Below you will find a proven method for plastering a cake to achieve perfectly even edges and an aesthetic finish.
Step 1: The right base—sponge cake and preparing the layers
The base of the cake is a well-baked, slightly dense sponge cake. Recipes with the addition of oil or water are ideal, as they give the dough greater elasticity. Make sure that the layers are cut evenly—a steel string tool or a knife with a height limiter can be helpful here. An even structure will facilitate subsequent plastering and ensure the stability of the construction.
Step 2: Layering and shaping the cake
It is worth placing the cake in a pastry ring or using a cake collar. This is a way to keep the sides straight when assembling the layers. Before adding the filling (e.g., fruit or flavored creams), it is recommended to make a “rim” of cream, which will later serve as a coating for the cake—it will secure the edges and prevent the filling from spilling out.
Step 3: Cooling the cake before frosting
After assembling all the layers, the cake should rest in the refrigerator for at least 2–3 hours. This will allow the mixture to set and the structure to stabilize. Without this step, you risk the cream on top not spreading evenly or the cake collapsing.
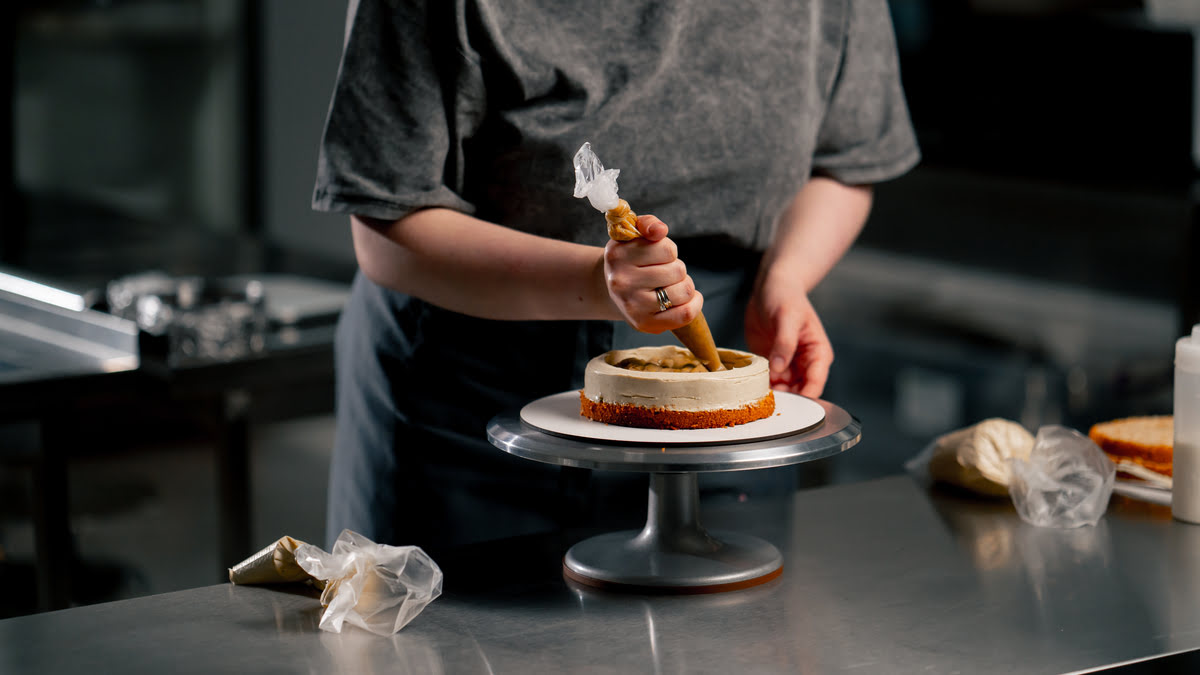
Step 4: First layer of frosting (crumb coat)
Before applying the final layer, cover the entire surface with a thin layer of cream, which will “bind” the crumbs and facilitate further plastering. This is the so-called crumb coat—indispensable if you want a perfectly smooth effect. Level the surface and chill the cake again for about 15 minutes.
Step 5: Applying the main frosting
Now it's time for the actual layer. Apply a generous amount of cream evenly to the sides and top. If you want, you can also color the frosting to your desired shade.
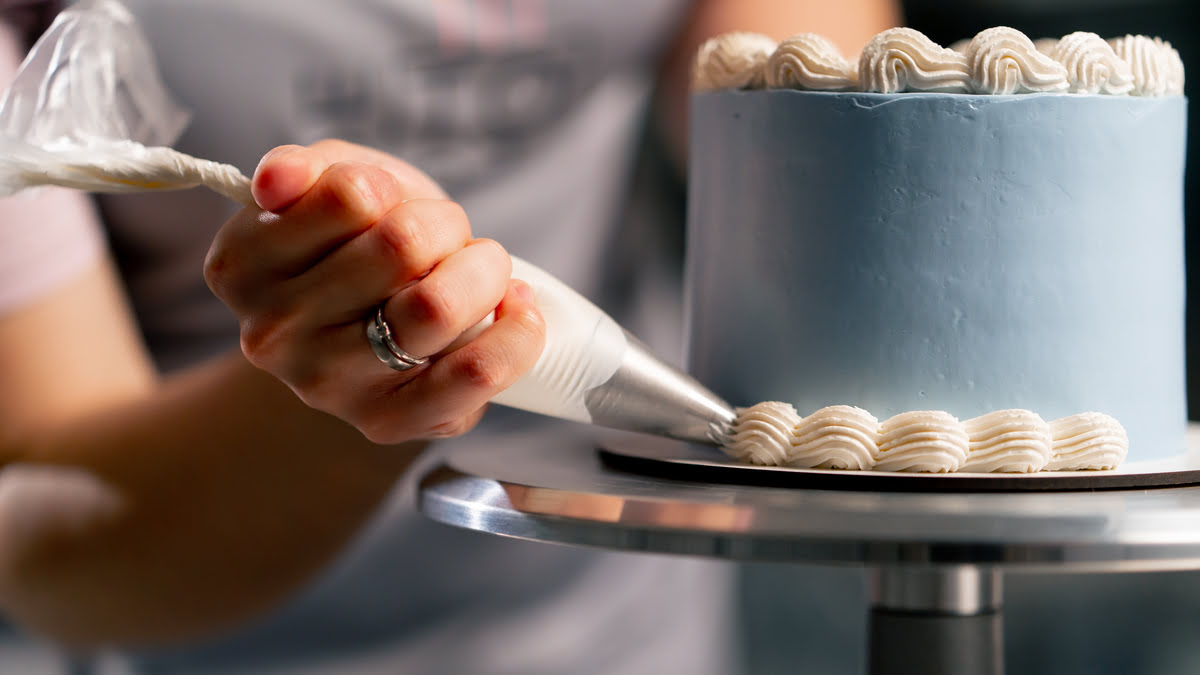
Step 6: Smoothing the sides and edges
Using a spatula with a long, straight edge, smooth the sides of the cake, holding the tool vertically and gently rotating the cake stand. Remove excess cream from the tool after each pass—this is the key to achieving an even surface without streaks or smudges.
Step 7: Finishing the top of the cake
Finally, smooth the top by gathering excess cream from the edges toward the center. You can use the same spatula as for the sides or use a smaller, curved spatula for greater precision. This is when the whole thing takes its final shape.
Maintaining order and accuracy at every stage means that even homemade baked goods can look like they came from a professional bakery. Regardless of whether you are preparing your chosen no-bake dessert, or a classic cake for a birthday, anniversary, or party—well-made frosting not only guarantees the delight of your guests, but also convenience in transport and durability of the decoration.
The most common mistakes when frosting a cake
Frosting a cake is an art that requires not only skill, but also knowledge of a few key principles. Even the best-prepared cream will not do its job if you make basic mistakes in the construction or cooling of the cake. Here are the most common mistakes that can ruin the final result and cause the frosted cake to lose its shape or aesthetic appeal.
Unstable cake structure
One of the most common problems is a lack of adequate stabilization. Several factors contribute to instability:
- Too fresh or delicate sponge cake, which has not had time to rest and settles under the weight of the filling,
- Incorrect cutting of the layers—too thin layers deform easily,
- Cutting off the side edges of the cake, which can weaken the structure of the edges,
- Filling with the wrong consistency—too thin and it flows out; too thick and it does not allow the layers to bond well,
- Excessive soaking of the cake, which softens the structure,
- Lack of cooling between the stages of assembling the cake,
- In the case of multi-tiered cakes—lack of supports and appropriate pads for the upper tiers.
Poor cream consistency
For cake frosting to go smoothly, the cream must have the right consistency. This is one of the most commonly overlooked aspects:
- If the frosting is too thin, it will run down the sides of the cake—it is best to chill it in the refrigerator for a few minutes.
- Too thick cream can damage the surface of the cake, causing tears or scratches,
- Cream taken out of the refrigerator needs time to reach room temperature—only then will it spread well.
Holes and air bubbles in frosting
Insufficiently de-aerated cream is another problem that leads to an unsightly finish. To avoid holes, it is worth mixing the mixture at low speed for a few minutes before use—preferably with a silicone spatula or mixer. This will ensure that the cake frosting is smooth and uniform.
Cracking frosting on the surface of the cake
Cracks can occur for several reasons:
- Unstable cake interior,
- Excessive compression of the layers in the ring—after removing the ring, the cake “expands,”
- A layer of frosting that is too thin and does not hold its shape,
- An unstable or overly soft base that “moves” when carrying the cake.
Unfavorable environmental conditions
The ambient temperature is extremely important, especially in summer. High temperatures soften the cream and weaken the structure of the cake. Both the cake itself and the frosting should be stored in a cool place until decoration. Avoid working in a hot kitchen—even the best cake frosting will not work if the conditions are too difficult.
Cake frosting – frequently asked questions
Preparing a perfectly smooth cake can raise many questions, especially if you are just starting your adventure with home baking. Below, we have compiled answers to the most frequently asked questions about frosting cakes, choosing the right cream, and frosting techniques.
How does cake frosting differ from regular filling cream?
The frosting for a cake must be much more stable than the filling. Its task is to create a smooth, temperature- and moisture-resistant coating that will hold the decorations in place and give the dessert the right shape. Filling cream is usually lighter and fluffier, but it will not work as an outer layer.
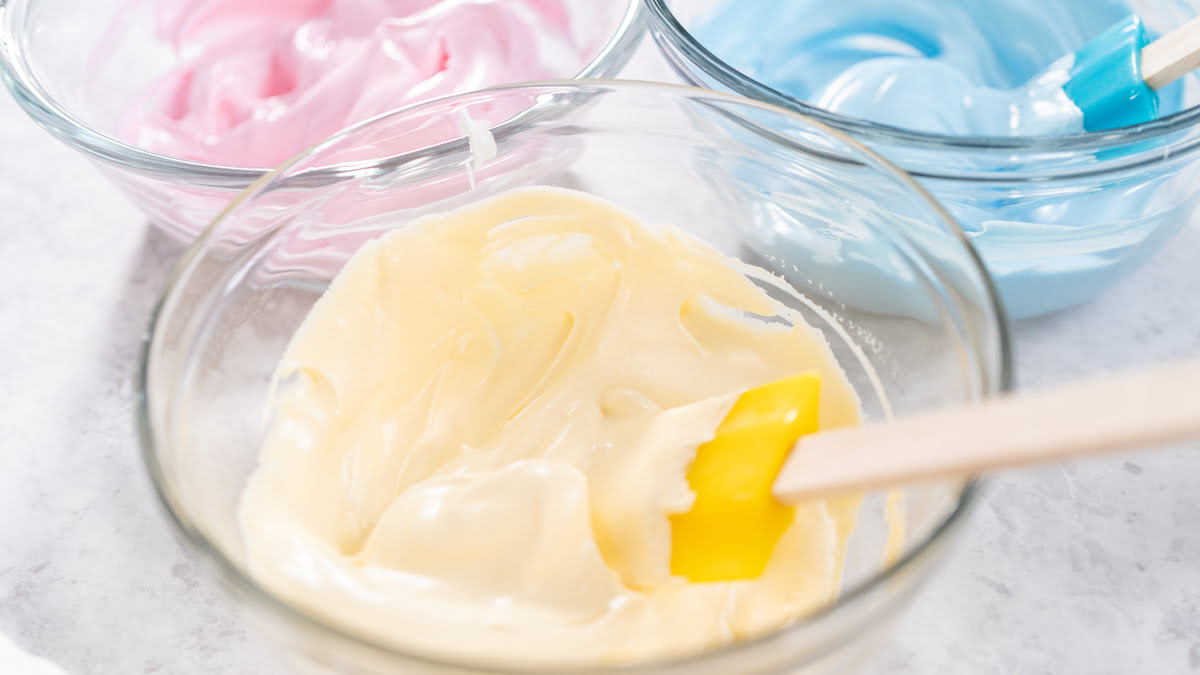
Can cake frosting be colored?
Yes, frostings—especially butter-based ones—take food coloring very well. The best results are achieved with gel or powdered dyes, which do not negatively affect the cream’s consistency. If you’re aiming for an intense color, it’s best to use a white frosting as the base, e.g., one made with mascarpone or condensed milk.
Why isn’t my frosting smooth and why does it have tiny holes?
This is most often the result of insufficient de-aeration of the cream. After preparing the mixture, mix it for a few minutes on low speed—this helps eliminate air bubbles and achieve a uniform texture. It’s also best to work with cream at room temperature.
How thick should the frosting layer be?
Usually, a layer 3–5 mm thick is enough. A layer that’s too thin may crack, while one that’s too thick can affect the taste and balance of the cake.
Which cream is best for frosting a cake in summer?
On hot days, a classic buttercream works best, as it withstands higher temperatures well. You can further stabilize it by adding chocolate or potato starch. Avoid light whipped-cream-based frostings, which may melt.
Is every cake suitable for frosting?
Not every cake. Cakes made with very moist or soft sponges, if not properly chilled first, may deform. The best for frosting are stable cakes with a compact structure that hold their shape well and have been properly cooled.
How to whiten cake frosting?
If you want the lightest possible color, try a white cake frosting made with mascarpone, condensed milk, or Swiss meringue—they naturally have a light hue. In the case of buttercream, you can add a whitening colorant (a “whitener”), which effectively lightens the cream without changing its consistency.
How many layers of frosting should be applied?
Typically, you apply two layers. The first, thin “crumb coat,” catches crumbs and levels the surface. After chilling it (usually 15–20 minutes in the fridge), apply the second, thicker layer. This final layer defines the shape, lets you achieve sharp edges, and prepares the cake for further decoration.
How do I fix curdled frosting?
Curdled buttercream is common, especially when ingredients had different temperatures. If the mixture looks split or grainy, try gently warming a small portion (in a water bath or microwave), then slowly mix it back into the rest while beating on low speed. Another method is to let the cream sit for a few minutes to reach a stable temperature and then beat again—sometimes patience is all it takes for the frosting to return to a smooth, uniform texture.
How to make black frosting for a cake?
Use buttercream as the base—it’s stable and takes pigment well. Add a little cocoa or melted dark chocolate to deepen the tone and reduce the amount of dye needed. Then gradually mix in black gel or powdered color (avoid liquid dyes), stirring thoroughly after each addition. Remember the color darkens after a few hours, so prepare the frosting in advance and let it “mature”—ideally overnight in the fridge.
How do I remove air bubbles from frosting?
After the frosting is prepared, mix it on low speed for a few minutes, preferably using a silicone paddle or flat beater. This helps release trapped air bubbles and gives a smooth, uniform texture—essential for precise frosting.
How should frosting be stored?
Store finished cake frosting in the refrigerator in an airtight container for up to 2–3 days. Before reuse, bring it to room temperature and give it a quick mix to restore the right consistency. Butter-based frostings can also be frozen; mascarpone- or cream-based frostings are best used fresh.


